Mycroft Personal Assistant Setup Part 1
Intro
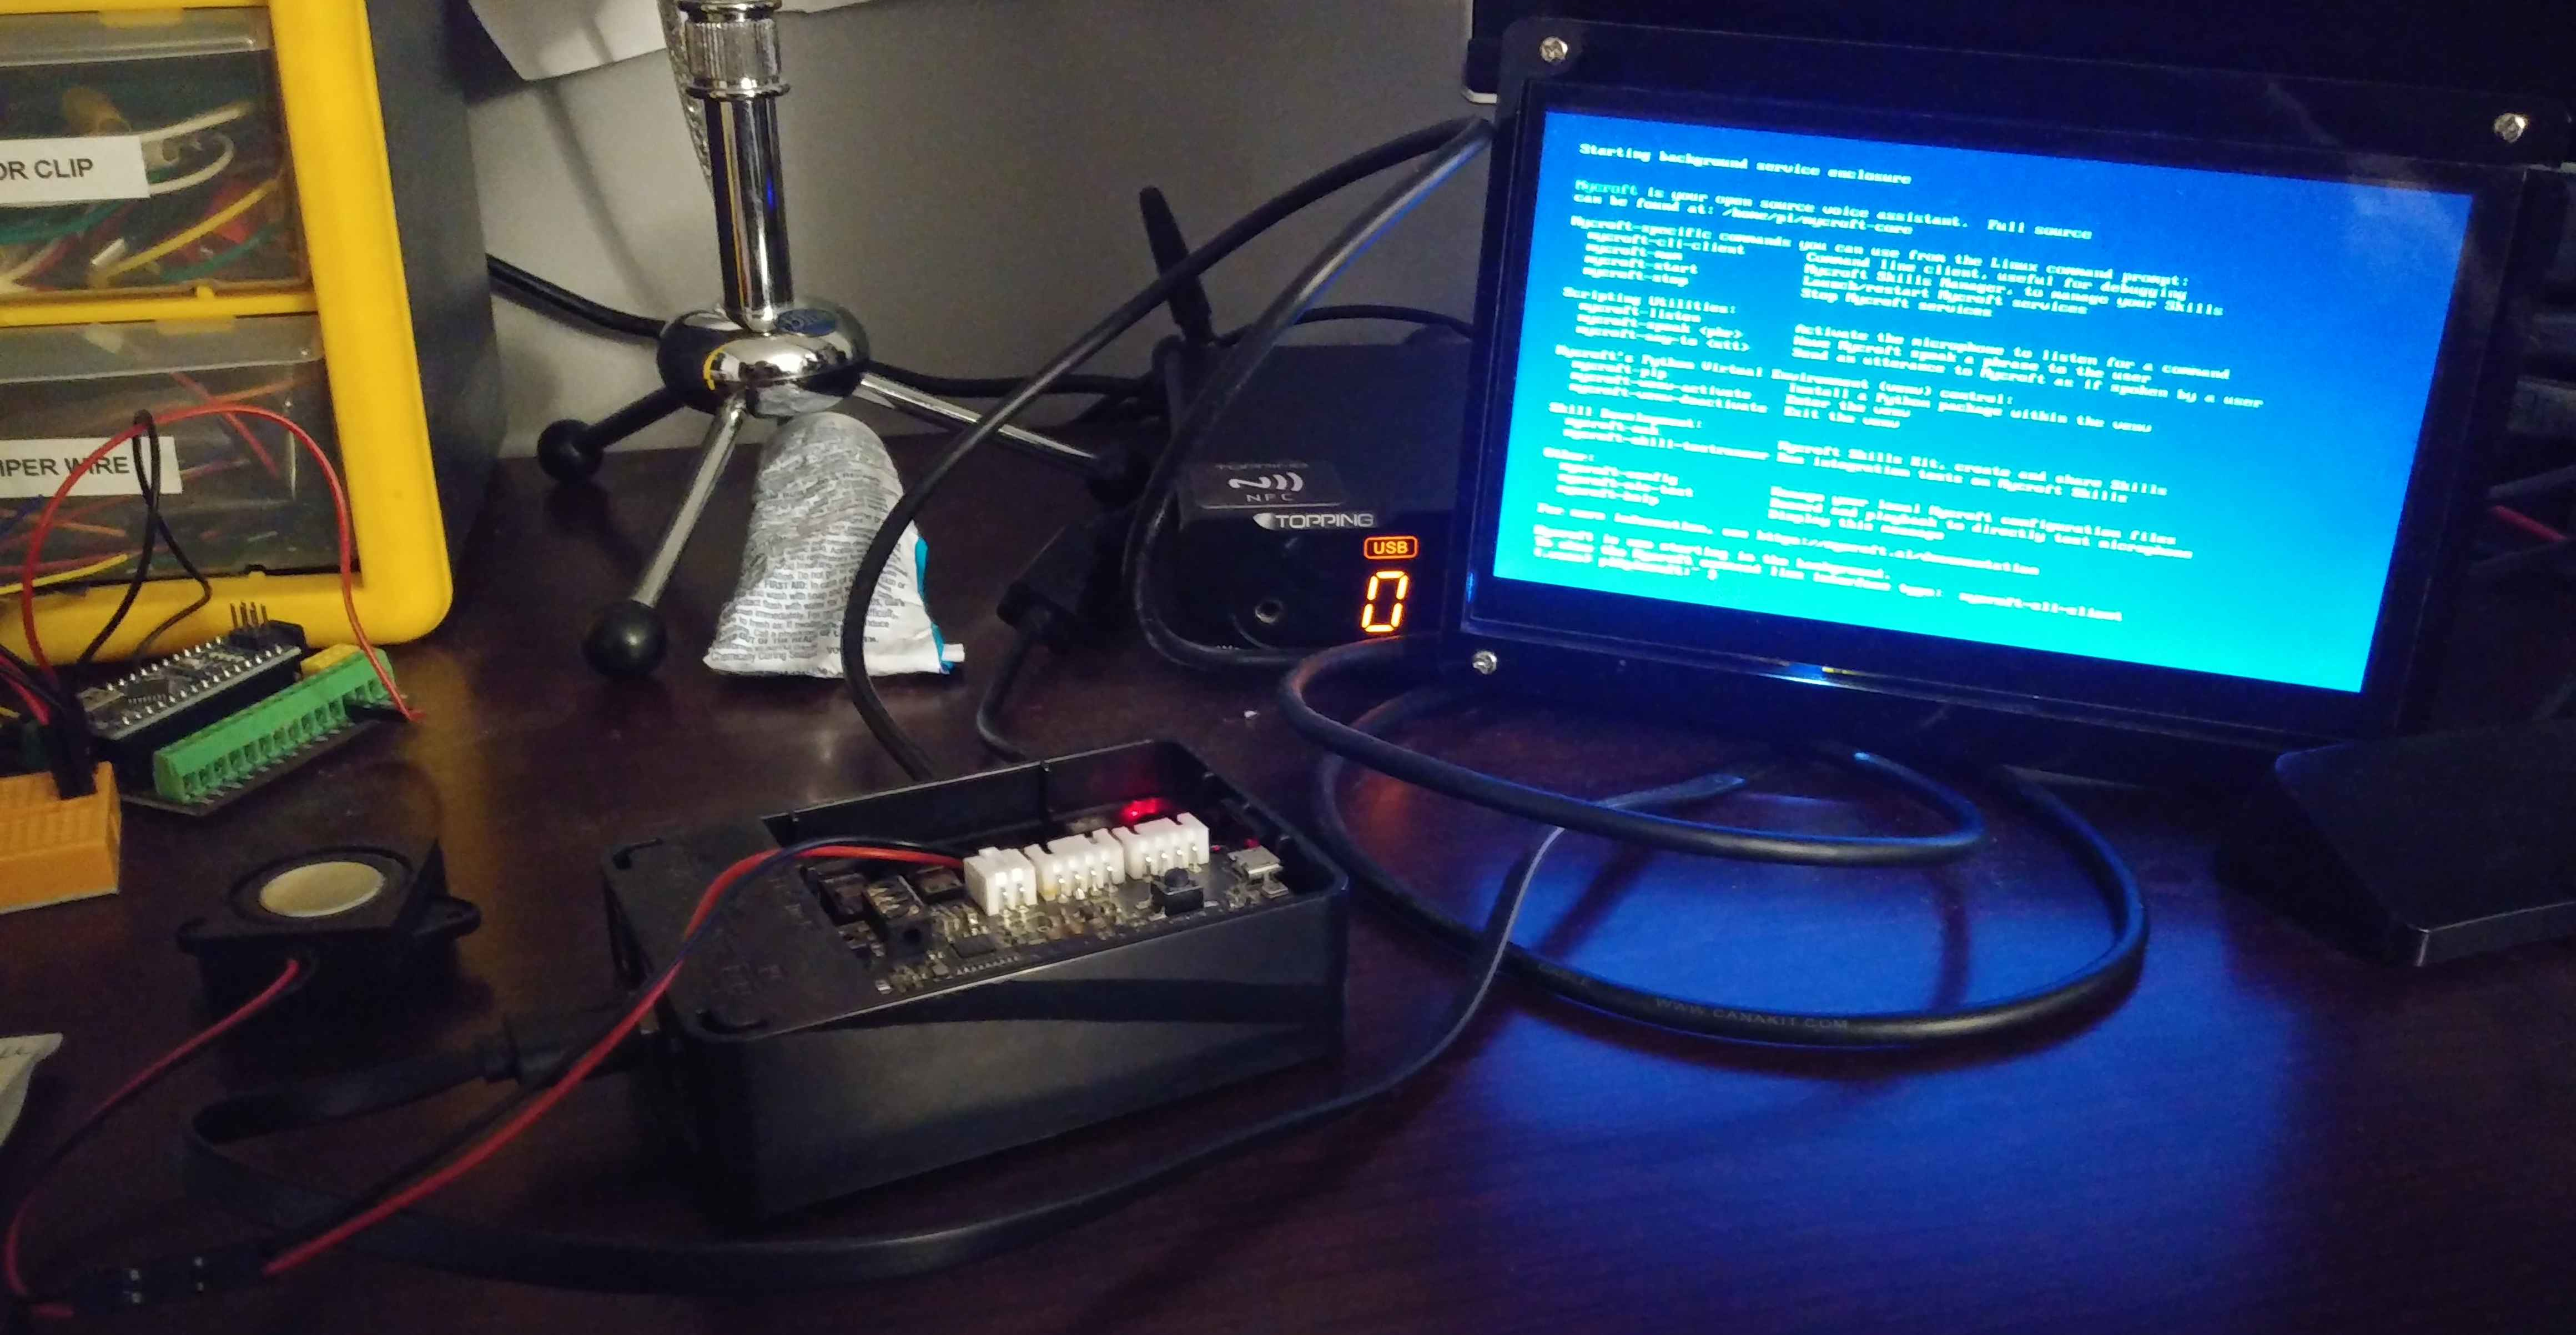
I have been fascinated by voice computing/electronic personal assistance for many years now but I am not a fan of inviting big tech into my home with a black box speaker. Because of this I have always looked for a open source solution. Early on, I was doing a bit of work with Jasper but I quickly ran out of time to play with that project. Over the years as electronic personal assistance become more popular I continued looking for a open alternative. In a conversation with a friend, I was pointed to the Mycroft project. I purchased a Raspberry Pi 4 for another reason and ended up not need it so it was looking for something to do with it. In another conversation a friend pointed me to the ReSpeaker 2-mic Pi Hat. So, all the pieces were falling into place all I needed was a little speaker that I was able to find fairly easy.
Hardware List
| part | cost |
|---|---|
| Raspberry Pi 4 Cancan Kit | $106.24 |
| ReSpeaker 2-mic Pi Hat | $12.74 |
| MakerHawk 4 Ohm 3 Watt Speaker | $9.75 |
| JST XH 2.54mm 24 AWG | $2.56 |
| 7" LCD Touch Screen | $53.00 |
| 7" Display Case | $12.99 |
Total: $194.72
The Build
The Raspberry Pi 4 Cancan kit comes with every you really need to get going with the Pi4 and the power cable has a on/off switch that is actually a really nice feature to have. The case the kit comes with works alright with the ReSpeaker 2-mic Pi Hat. The only drawback is you will not be able to close the top when the hat is on but that is alright because you need to attach the speaker to the JST speaker port. The MakerHawk speaker comes with a JST-PH 2.0mm connection. The ReSpeaker hat has a JST XH 2.54mm plug. I cut the JST head off the speaker and crimped on a 2-pin Dupont connection to the speaker and the JST XH lead. The ReSpeaker hat has a power connection on it. This was a bit confusing to me because I was not sure if I had to plug the power into the hat and none of the docs were very clear on this. I started out with it plug into the hat but while doing the software setup I got some odd behavior and ended up moving to the normal power port on the Pi4. I think this could be caused by the different power requirements between the older Pi models and the Pi4 but either way it is not needed to operate the hat.

 *ignore Snowball and Topping MX3
Software Setup
Mycroft has a image that is ready made for the Pi called Picroft. I downloaded the image and used dd to set up the sd card for the Pi. If you need any help doing this we have a small post about
creating bootable flash drives that covers the process. Once the sd card is ready and loaded into the Pi this is where the fun starts.
Picroft has a setup wizard that tries to walk you through the setup of your device but with this build being fairly custom the simple path was not the road I could travel. This led me down a long road of trial and error.
First thing was getting the ReSpeaker hat setup and detected. The process for installing the driver is as follows:
# first make sure your image is updated
sudo apt update
# Second grab the driver from github and install it
git clone https://github.com/respeaker/seeed-voicecard.git
cd seeed-voicecard
sudo ./install_arm64.sh
sudo reboot now
There is an install.sh file in the repo if you desire the 32 bit driver but we are working with the Pi4 so do not run that install it wont work.
After it is installed and you have rebooted you have verify the card is being detected with aplay -l and arecord -l.
The output should look something like this:
(.venv) pi@picroft:~ $ aplay -l
**** List of PLAYBACK Hardware Devices ****
card 0: b1 [bcm2835 HDMI 1], device 0: bcm2835 HDMI 1 [bcm2835 HDMI 1]
  Subdevices: 4/4
  Subdevice #0: subdevice #0
  Subdevice #1: subdevice #1
  Subdevice #2: subdevice #2
  Subdevice #3: subdevice #3
card 1: Headphones [bcm2835 Headphones], device 0: bcm2835 Headphones [bcm2835 Headphones]
  Subdevices: 4/4
  Subdevice #0: subdevice #0
  Subdevice #1: subdevice #1
  Subdevice #2: subdevice #2
  Subdevice #3: subdevice #3
card 2: seeed2micvoicec [seeed-2mic-voicecard], device 0: bcm2835-i2s-wm8960-hifi wm8960-hifi-0 [bcm2835-i2s-wm8960-hifi wm8960-hifi-0]
  Subdevices: 1/1
  Subdevice #0: subdevice #0
(.venv) pi@picroft:~ $ arecord -l
**** List of CAPTURE Hardware Devices ****
card 2: seeed2micvoicec [seeed-2mic-voicecard], device 0: bcm2835-i2s-wm8960-hifi wm8960-hifi-0 [bcm2835-i2s-wm8960-hifi wm8960-hifi-0]
  Subdevices: 0/1
  Subdevice #0: subdevice #0
Now you will need to set your defaults in pulse audio. The Pulseadio Settings section of the Mycroft audio troubleshooting guide covers this well.
There is another setting I had to make to the Pulse audio daemon configuration file to remove a delay in recording after the wake word was triggered. I will place this here while we are addressing pulse audio settings:
Edit /etc/pulse/daemon.conf with the following settings:
resample-method = ffmpeg
default-sample-format = s24le
default-sample-rate = 48000
alternate-sample-rate = 44100
After this restart pulseaudio:
pulseaudio -k #stop the pulse daemon
pulseaudio -D #start the pulse daemon
The last item for the base setup is setting the audio settings in the mycroft.conf file`.
Mycorft will look for configurations in 3 locations:
- remote - pulled from the home.mycroft.ai
- system -
/etc/mycroft/mycroft.conf - user -
~/.config/mycroft/mycroft.conf
I copied the system config to the user location:
cp /etc/mycroft/mycroft.conf ~/.config/mycroft/mycroft.conf
and made the following change to the change:
   "play_wav_cmdline": "aplay %1",
   "play_mp3_cmdline": "mpg123 %1",
Essentially removing the hardware setting and using the system defaults we set earlier.
Once all this is done you can run a few tests:
mycroft-mic-test
If the results are good you can fire up mycroft:
mycroft-start all
Then run the mycroft cli tool:
mycroft-cli-client
From here it will run you through the setup of your mycroft device and registering it with home.mycroft.ai.
Conclusion
At this point you have a mycroft device. If you are like me and do not want the standard hey mycroft wakeword that uses precise you are getting a bunch of false positives on your wakeword because pocketsphinx is just not accurate enough.
In my next post in this mycroft series I will run you through training a custom wake word with Precise to fix this issue. I hope to take this series all the way to the point where the microft devices can be 100% offline.
Links:
Hardware
- Raspberry Pi 4 Cancan Kit
- Respeaker 2-mic Pi Hat
- MakerHawk 4 Ohm 3 Watt Speaker
- JST XH2.54mm 24 AWG
- 7" LCD Touch Screen
- 7" Display Case